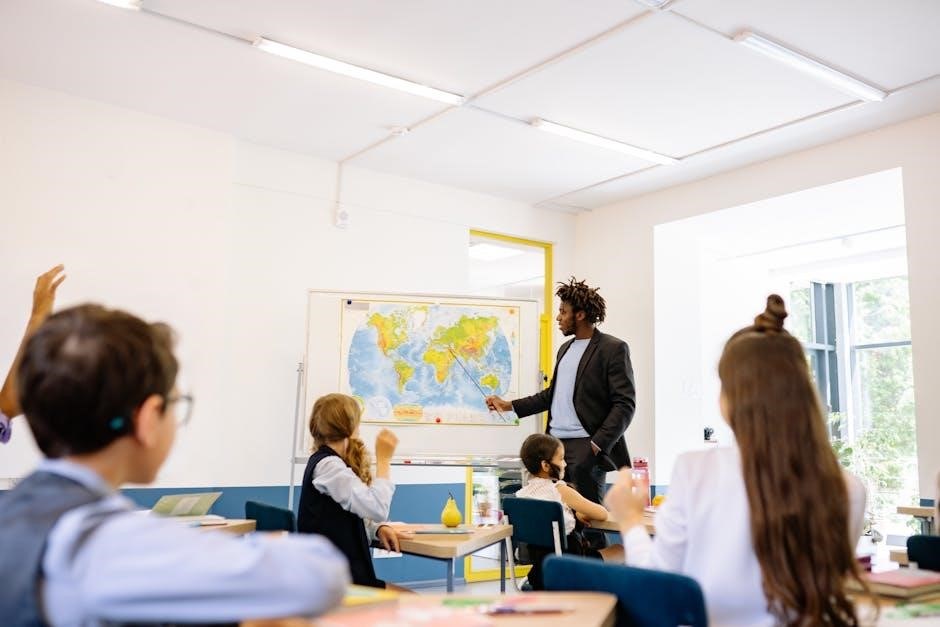
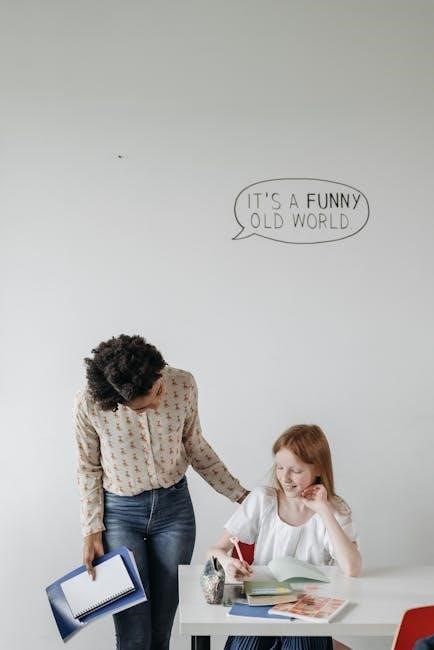
teachers instructions in a class on pointillism

Pointillism is a painting technique developed in the late 19th century, characterized by applying small dots of color to create detailed, high-contrast images. Georges Seurat pioneered this method, emphasizing optical blending of colors. It teaches students about color theory and texture, inspiring creativity and patience in the artistic process.
1.1 Brief History and Evolution
Pointillism emerged in the late 19th century, pioneered by Georges Seurat and Paul Signac. It evolved from Impressionism, emphasizing scientific color theory and optical mixing. The technique involved applying small dots of pure color, allowing the viewer’s eye to blend them. Initially met with skepticism, it gained recognition for its innovative approach. Over time, pointillism influenced various art movements, including Fauvism, and remains a significant teaching tool in art education, fostering understanding of color and composition.
1.2 Key Characteristics of Pointillism
Pointillism is defined by its use of small, distinct dots of color applied in patterns to form an image. The technique relies on optical mixing, where the viewer’s eye blends the dots into a cohesive picture. High contrast and vivid colors are achieved through careful placement of primary and secondary hues. The method requires patience and precision, as the artist must plan and execute thousands of dots to create the desired effect. This approach emphasizes texture and detail, making it a unique and challenging artistic practice.
1.3 Importance of Pointillism in Art Education
Pointillism is a valuable teaching tool in art education, fostering an understanding of color theory, texture, and optical blending. It encourages students to explore how dots of color can create detailed, cohesive images, enhancing their creativity and fine motor skills. The technique also teaches patience and attention to detail, making it a rewarding and educational experience. By studying pointillism, students gain insight into art history and the innovative methods of pioneers like Georges Seurat, bridging technique with artistic expression.

Materials and Supplies Needed
Essential supplies include Q-tips, watercolor paper, and primary-colored paints. Optional materials like micropipettes and sticker dots enhance creativity and precision in pointillism techniques.
2.1 Basic Art Supplies for Pointillism
The essential supplies for teaching pointillism include Q-tips or small brushes for applying dots, watercolor paper for durability, and primary-colored paints for color mixing. Additional tools like paintbrushes, masking tape, and a pencil for sketching are useful. For younger students, sticker dots or pre-made templates can simplify the process. A magnifying glass or digital zoom helps students observe the technique’s detail. These materials are cost-effective and readily available, making them ideal for classroom settings.
2.2 Optional Materials for Advanced Techniques
For advanced pointillism techniques, consider using micropipettes for precise dotting, canvas panels for professional finishes, and acrylic paints for vibrant, fast-drying results. Airbrushes can add subtle texture, while easels and large-scale paper encourage more ambitious projects. Digital tools like graphic tablets or art software offer modern alternatives. For mixed media, incorporate glue or resin to add depth. These materials cater to older or more experienced students, allowing for complex compositions and innovative interpretations of the pointillism technique.
2.3 Digital Tools for Modern Pointillism
Digital tools offer innovative ways to explore pointillism, allowing students to experiment with precision and customization. Graphic tablets and art software like Adobe Photoshop or Procreate enable the creation of intricate dot patterns with ease. Apps such as PicassoTile or Dotting simplify the process for beginners, while online tutorials and videos provide step-by-step guidance. These tools make the technique more accessible and engaging, especially for tech-savvy learners, fostering creativity and technical skills in a modern classroom setting.
Lesson Plan Structure
A well-structured lesson plan introduces pointillism, demonstrates techniques, provides guided practice, and concludes with independent projects, ensuring a comprehensive learning experience for students.
Begin by introducing pointillism as a painting method using small dots of color. Explain its historical roots, popularized by Georges Seurat, and its reliance on optical blending. Discuss how students will explore primary and secondary colors, texture, and composition. Emphasize the technique’s ability to create detailed, high-contrast images. This foundational lesson will inspire creativity and teach patience and attention to detail, helping students understand how individual dots can form cohesive, vibrant works of art.

3.2 Demonstrating Pointillism Methods
Begin by demonstrating how to apply small dots of color using Q-tips or brushes. Show how primary colors can be mixed to create secondary hues. Illustrate how dots can form shapes and textures when viewed from a distance. Use a simple still-life setup or a landscape sketch to demonstrate layering and blending. Emphasize the importance of spacing and density in achieving desired effects. This hands-on approach will help students understand how pointillism works and inspire them to experiment with the technique.
3.3 Guided Practice Sessions
During guided practice, students will work on creating simple pointillist artworks under supervision. Start with a basic exercise, such as painting a color wheel or a small still-life using dots. Demonstrate how to layer dots to achieve depth and texture. Circulate the room to assist students, offering feedback on dot placement, spacing, and color mixing. Encourage experimentation while ensuring understanding of the technique. This step helps students refine their skills and build confidence before moving to independent projects.
3.4 Independent Project Work
After guided practice, students will apply their pointillism skills to an independent project. They will choose a subject, such as a landscape or still-life, and create a detailed pointillist painting. Encourage students to experiment with color blending and layering dots for texture. Provide materials like Q-tips, paint, and paper, and allow students to work at their own pace. Offer individualized feedback to refine their technique and ensure understanding of the method. This step fosters creativity and reinforces learning.
3.5 Conclusion and Review
Conclude the lesson by reviewing key pointillism concepts and techniques. Display student projects for a class discussion, encouraging reflection on their learning. Highlight how pointillism relates to color theory and optical illusions. Provide constructive feedback and celebrate progress. Discuss how students can apply these skills to future art projects, fostering continued exploration and creativity. This final review reinforces understanding and builds confidence in their artistic abilities.
Assessment and Feedback

Use formative assessments to monitor progress and provide immediate feedback. Summative assessments evaluate completed projects based on technique, creativity, and understanding. Constructive feedback guides improvement and growth.
4.1 Formative Assessment Techniques
Implement formative assessments through observations, verbal feedback, and peer reviews. Monitor students’ progress during guided practice, offering tailored advice on color mixing and dot placement. Use one-on-one check-ins to address individual challenges and celebrate improvements. Encourage students to reflect on their work and set personal goals. This approach ensures immediate feedback, fostering growth and understanding throughout the learning process. Techniques like class discussions and sharing work-in-progress help identify areas needing additional support or clarification.
4.2 Summative Assessment Methods
Summative assessments evaluate students’ final projects, ensuring understanding of Pointillism techniques. Review completed artworks for color accuracy, composition, and adherence to the method. Use rubrics to grade technical skill and creativity. Have students present their work, explaining their process and inspirations. Collect portfolios to track progress and provide a final evaluation. This comprehensive approach measures mastery of the technique and readiness for more complex artistic challenges, offering a clear conclusion to the lesson series.
Famous Pointillism Artists
Georges Seurat pioneered Pointillism, creating iconic works like A Sunday Afternoon. Paul Signac refined the technique, while others like Henri-Edmond Cross contributed significantly to its development.
5.1 Georges Seurat and His Contributions
Georges Seurat, a French post-impressionist, pioneered Pointillism, developing the technique of applying small dots of pure color. His iconic work, A Sunday Afternoon on the Island of La Grande Jatte, exemplifies this method. Seurat’s innovative approach emphasized optical mixing, allowing viewers to blend colors perceptually. His work laid the foundation for modern art movements and inspired artists like Paul Signac to refine Pointillism further. Seurat’s contributions remain central to the study and practice of this unique artistic style.
5.2 Paul Signac and His Techniques
Paul Signac, a French neo-impressionist, refined Pointillism alongside Georges Seurat. He emphasized vibrant colors and bold contrasts, often painting landscapes and seascapes. Signac’s technique involved applying dots in rhythmic patterns, creating dynamic compositions. His work, such as Portrait of Félix Fénéon, showcases meticulous detail. Signac also wrote From Eugene Delacroix to Neo-Impressionism, theorizing Pointillism. His contributions expanded the movement’s reach, blending scientific color theory with artistic expression, leaving a lasting impact on modern art.
5.3 Other Notable Pointillism Artists
Beyond Seurat and Signac, artists like Henri-Edmond Cross and Maximilien Luce embraced Pointillism. Cross, known for serene landscapes, emphasized harmony and chromatic effects. Luce focused on social themes, blending Pointillism with realism. Theo van Rysselberghe adapted the technique to portraiture, while Charles Angrand explored its potential in everyday scenes. These artists expanded Pointillism’s scope, proving its versatility across subjects and styles, and leaving a rich legacy in modern art history.
Age-Specific Teaching Strategies
Age-specific teaching strategies adapt Pointillism techniques to suit different learning levels, ensuring engaging and effective art education for students of all ages and skill levels.
6.1 Teaching Pointillism to Elementary Students
Teaching Pointillism to elementary students involves simplifying the technique using Q-tips and primary colors. Start with basic color mixing and simple images like fruits or landscapes. Use demonstrations to show how dots blend into shapes and colors. Encourage students to experiment with patterns and textures, fostering creativity and patience. Provide structured yet fun activities, allowing students to explore optical blending at their own pace. Positive reinforcement and hands-on practice help young learners grasp this artistic method effectively.
6.2 Engaging Middle School Students
Engage middle school students with pointillism by introducing detailed projects like landscapes or portraits. Use Q-tips and paints to demonstrate techniques, encouraging students to experiment with color blending. Discuss famous artists like Seurat and Signac to inspire creativity. Incorporate group activities and technology, such as digital pointillism tools, to enhance learning. Relate the technique to math and history for cross-curricular connections. This approach fosters patience, understanding of color theory, and appreciation for artistic detail, making lessons both educational and enjoyable.
6.3 Advanced Techniques for High School Students
For high school students, introduce advanced pointillism techniques, such as layering and blending colors for depth. Encourage intricate compositions like portraits or cityscapes. Use small brushes for precision and explore optical illusions. Incorporate digital tools for modern interpretations. Discuss the contributions of Seurat and Signac, emphasizing their innovative approaches. Assign projects that challenge students to create detailed, large-scale works. Encourage critiques and reflections to refine their skills, fostering a deeper understanding of color theory and artistic expression.
Classroom Management Tips
Encourage focus by setting clear expectations and demonstrating techniques. Maintain a clean workspace and ensure safety with art materials. Provide individualized support and positive feedback to students.
7.1 Maintaining Focus and Discipline
To maintain focus, start with a clear lesson plan and demonstrate techniques step-by-step. Use visual aids like slideshows or paintings to engage students. Encourage questions and discussions but keep them on topic. Assign structured activities, such as sketching or painting exercises, to ensure students stay engaged. Positive reinforcement and individual support can help sustain concentration. For younger students, use interactive tools like Q-tips or magnifying glasses to explore pointillism up close, fostering curiosity and discipline.
7.2 Encouraging Student Participation
Encourage participation by creating a supportive environment where all students feel comfortable sharing ideas. Start with hands-on activities, such as Q-tip painting or dot art, to engage even the hesitant. Pair students for collaborative projects, fostering teamwork and creativity. Allow time for students to share their work, offering constructive feedback and praise. For younger students, use interactive tools like magnifying glasses to explore pointillism up close. Make lessons fun and relevant, incorporating choice-based projects to cater to individual interests and skills.
7.3 Safety Precautions in the Art Classroom
Ensure students handle art supplies safely, especially small tools like Q-tips or scissors. Demonstrate proper techniques to avoid accidents. Use washable, non-toxic paints and provide aprons or smocks. Teach students to clean tools and dispose of materials correctly. Supervise closely during activities involving sharp objects or chemicals. Encourage handwashing after class and maintain a tidy workspace to prevent tripping hazards. For pointillism, emphasize careful use of materials to avoid eye strain or injuries from sharp objects. Keep a first aid kit nearby and train students on emergency procedures, such as spills or cuts.
Connecting Pointillism to Other Subjects
Pointillism connects to color theory in science, structured techniques in math, and historical context in social studies, offering interdisciplinary learning opportunities that enrich artistic and academic understanding.
8.1 Linking to Color Theory
Pointillism inherently connects to color theory, as it relies on the optical mixing of primary and secondary colors. By applying small dots of pure color side by side, students learn how colors interact and blend when viewed from a distance. This technique introduces key principles of the color wheel and pigment mixing, enabling students to explore how hues can create vibrant, dynamic compositions. This connection fosters a deeper understanding of color theory and its practical application in art.
8.2 Integrating with Art History
Pointillism fits into the broader narrative of art history as a bridge between Impressionism and modern movements like Fauvism. Originating in the late 19th century, it was pioneered by Georges Seurat and Paul Signac, who sought to break away from traditional techniques. By studying pointillism, students gain insights into its historical context and its influence on later art movements. This integration helps learners appreciate how artistic styles evolve and connect across time, fostering a deeper understanding of cultural and creative development.
8.3 Cross-Curricular Connections
Pointillism can be integrated into various subjects, enhancing interdisciplinary learning. In math, students explore patterns, symmetry, and geometry through dot arrangements. Science connections include color theory and optical mixing. Technology allows students to create digital pointillism art, exploring pixelation and software tools. Additionally, language arts can involve researching and writing about artists like Seurat. These connections enrich students’ understanding and showcase pointillism’s versatility across subjects, fostering a holistic educational experience.
Pointillism offers a unique way to explore color, texture, and creativity, fostering patience and artistic expression. It bridges art with other subjects, inspiring students to further explore its techniques and history.
9.1 Summary of Key Points
Pointillism, pioneered by Georges Seurat and Paul Signac, involves creating images with small dots of color. It teaches color theory, texture, and optical blending. Lessons often compare modern and historical techniques, using materials like Q-tips or digital tools. Instructional strategies vary by age, from simple dot art for younger students to advanced projects for high school. The method fosters creativity, patience, and critical thinking, while connecting art to other subjects like history and science, encouraging further exploration and artistic growth.

9.2 Encouraging Further Exploration
Encourage students to explore pointillism beyond the classroom by visiting art museums or exhibitions featuring works by Seurat and Signac. Suggest online resources, such as videos and tutorials, to deepen their understanding of the technique. Assign projects that integrate pointillism with other subjects, like science or history, to foster interdisciplinary learning. Encourage students to experiment with digital tools or create collaborative murals using pointillism, inspiring creativity and a lifelong appreciation for the arts.