rain bird irrigation system manual

Rain Bird Irrigation System Manual: A Comprehensive Guide
This manual provides detailed guidance for Rain Bird systems‚ covering troubleshooting‚ repairs‚ and advanced settings like pump start relays and decoder controllers.
Understanding Your Rain Bird System
Rain Bird irrigation systems are designed for efficient water distribution‚ catering to diverse landscaping needs. A core component is the controller‚ like the ESP-Me‚ which automates watering schedules. These systems utilize valves‚ solenoids‚ and spray heads to deliver water precisely where needed. Proper operation relies on understanding the interplay between these components and recognizing potential issues. Troubleshooting guides‚ such as those from Irrigation Direct‚ highlight common problems like clogged spray heads or faulty solenoids. Regular maintenance‚ including winterization‚ is crucial for longevity. Familiarizing yourself with your system’s specific model and features‚ as detailed in the manual‚ ensures optimal performance and water conservation. Expert services are available for complex repairs or installations.
Components of a Typical Rain Bird System
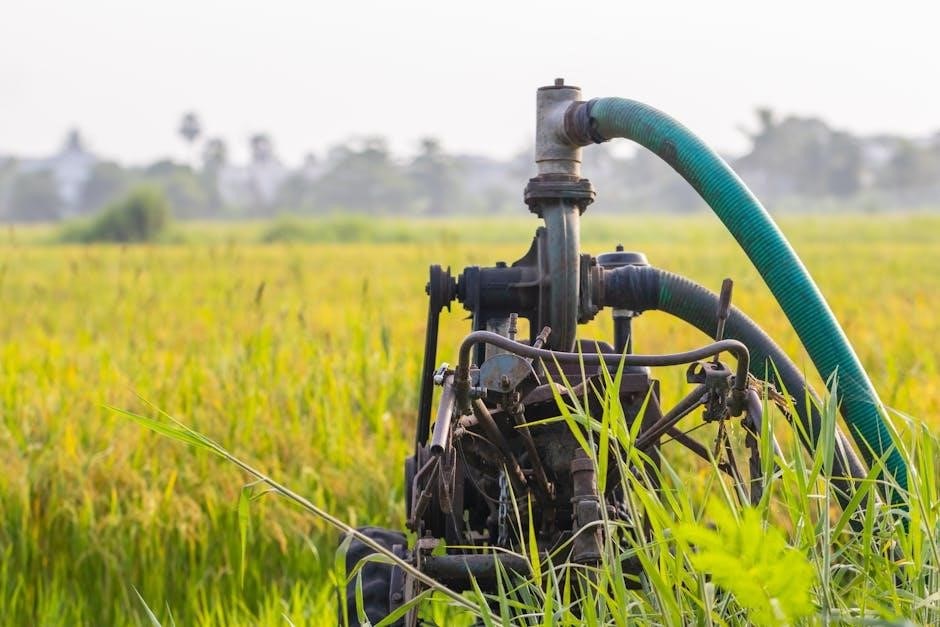
A standard Rain Bird system comprises several key elements working in harmony. The controller (e.g.‚ ESP-Me‚ ESP-LXD) acts as the brain‚ managing watering schedules. Valves‚ often with replaceable solenoids‚ control water flow to specific zones; Spray heads distribute water across lawns and gardens‚ requiring periodic adjustment and replacement. A rain sensor prevents watering during rainfall‚ conserving water. Piping connects these components‚ and a pump start relay may be used for systems with low water pressure. Troubleshooting guides emphasize checking these parts for issues like clogs or electrical faults. Understanding each component’s function is vital for effective maintenance and repair.
Rain Bird ESP-Me Controller: Overview and Features
The Rain Bird ESP-Me controller is a popular‚ user-friendly choice for residential irrigation. It features three independent programs (A‚ B‚ and C) allowing customized watering schedules. Users can set individual start times and watering durations for each zone. A key feature is its seasonal adjustment capability‚ optimizing water usage based on weather conditions. The ESP-Me also supports a rain sensor input for automatic shut-off during precipitation. Its intuitive interface simplifies programming‚ while a manual run function enables on-demand watering. It’s designed for easy installation and reliable performance‚ making it a cornerstone of many irrigation systems.
Programming the ESP-Me Controller: Basic Setup
Initial setup of the ESP-Me controller involves defining essential parameters for automated watering. Begin by ensuring power connectivity and accessing the programming mode. The first step is setting the current date and time accurately‚ crucial for schedule execution. Next‚ assign each zone a number and define its watering duration. Utilize Programs A‚ B‚ and C to categorize different watering needs – perhaps lawn‚ shrubs‚ and flowers. Remember to establish a start time for each program. Regularly review and adjust these settings based on seasonal changes and plant requirements for optimal water conservation.

Setting the Date and Time
Accurate date and time settings are fundamental for the ESP-Me controller’s functionality. Access the “Date/Time” menu via the controller’s interface. Use the arrow buttons to navigate and adjust the month‚ day‚ and year. Confirm each selection before proceeding. Subsequently‚ set the hour and minute‚ paying close attention to AM/PM designation. A correctly configured time ensures watering schedules initiate at the desired times. Incorrect settings can lead to watering during inappropriate hours or days. Regularly verify the date and time‚ especially after power outages‚ to maintain schedule precision.
Creating Watering Schedules (Programs A‚ B‚ and C)
The ESP-Me controller offers three independent programs (A‚ B‚ and C) for flexible watering management. Each program allows customized schedules tailored to specific zones or plant types. Begin by selecting a program and assigning desired stations. Define a start time for each program‚ specifying when watering should commence. Set the watering duration for each station‚ considering plant needs and soil conditions. You can also choose specific days of the week for watering. Utilize multiple programs to create varied schedules‚ optimizing water usage and plant health throughout your landscape.

Troubleshooting Common Rain Bird System Issues
Encountering problems with your Rain Bird system? Common issues include the system failing to turn on‚ stations not cycling automatically‚ or valve malfunctions. Begin by verifying the power supply and controller settings. Inspect the wiring connections for any loose or damaged wires. A faulty rain sensor can also prevent operation; consider bypassing it for testing. If stations aren’t cycling‚ check the program settings and ensure start times are correctly configured. Addressing these initial checks often resolves typical issues‚ restoring efficient irrigation. Remember safety first when working with electrical components!
System Won’t Turn On: Identifying the Cause
If your Rain Bird system fails to power on‚ systematically check potential causes. First‚ confirm the controller has power – verify the transformer is correctly plugged in and functioning. Inspect the circuit breaker or fuse box for tripped breakers or blown fuses. A disconnected or damaged wire within the valve box is another frequent culprit; carefully examine all connections. Don’t overlook the rain sensor‚ as a faulty sensor can override the system. Finally‚ ensure the controller’s manual run function isn’t inadvertently disabled. Thorough investigation will pinpoint the issue.
Stations Not Cycling Automatically: Addressing the Problem
When stations don’t advance automatically‚ several factors could be at play. Confirm a valid start time is programmed within the active watering schedule (Programs A‚ B‚ or C) on your ESP-Me controller. Verify that the station run time isn’t set to zero‚ preventing activation. Inspect valve wiring for loose connections or breaks‚ especially within the valve box. A malfunctioning valve solenoid can also cause this issue. Ensure the rain sensor isn’t actively pausing the system. Finally‚ double-check for any overlapping station schedules that might interfere with automatic cycling.
Diagnosing and Repairing Valve Issues
Valve problems are common in irrigation systems. Begin by visually inspecting valves for physical damage. A non-cycling station often indicates a faulty solenoid; replacement is usually straightforward. Disconnect power before attempting any electrical work. Clogged valve diaphragms restrict water flow; remove the bonnet‚ inspect‚ and clean the diaphragm carefully. Ensure proper reassembly to maintain a watertight seal. If issues persist‚ check the valve body for cracks or internal debris. Consider replacing the entire valve if damage is extensive. Always test the repaired valve before reburying it.
Replacing a Rain Bird Valve Solenoid
Replacing a solenoid is a frequent valve repair. First‚ disconnect power to the controller! Carefully remove the solenoid from the valve body – typically held in place by screws. Note the wire connections before disconnecting them; a photo helps. Match the new solenoid’s voltage to your system (usually 24V AC). Connect the wires identically to the new solenoid. Ensure a snug fit‚ but avoid over-tightening screws. Reassemble the valve and restore power. Test the station to confirm proper operation. A faulty solenoid prevents the valve from opening or closing correctly‚ halting water flow.

Checking for Clogged Valve Diaphragms
Clogged diaphragms restrict water flow and cause valve malfunctions. Begin by shutting off the water supply and relieving pressure. Disassemble the valve body‚ carefully noting the component order. Inspect the diaphragm for debris‚ mineral buildup‚ or tears. Clean the diaphragm with a soft brush and water; avoid harsh chemicals. If damaged‚ replace the diaphragm – they are inexpensive. Reassemble the valve‚ ensuring the diaphragm is seated correctly. Restore water pressure and test the valve’s operation. A properly functioning diaphragm ensures efficient water delivery to your irrigation zones.
Dealing with Rain Sensor Problems
Rain sensors prevent watering during precipitation‚ conserving water. If your system ignores the sensor‚ begin by verifying its wiring connections at both the sensor and controller. Test the sensor’s functionality by manually activating it – the controller should immediately halt watering. A faulty sensor may require bypassing; disconnect the sensor wires at the controller to temporarily disable it. If bypassing resolves the issue‚ replace the sensor. Regularly inspect the sensor for debris or corrosion. Proper sensor operation is crucial for efficient water management and preventing overwatering during rainfall events.
Testing Rain Sensor Functionality
To test your Rain Bird rain sensor‚ initiate a manual watering cycle on your controller. Then‚ manually activate the sensor‚ typically by wetting its surface as if it were raining. The controller should immediately cease watering‚ confirming the sensor is sending a signal. If watering continues‚ check the wiring connections at both the sensor and the controller terminals. Ensure wires are securely fastened and free from corrosion. A multimeter can verify voltage transmission. If the sensor fails to halt watering even with proper connections‚ it likely needs replacement for optimal system performance.
Bypassing a Faulty Rain Sensor

If a Rain Bird rain sensor malfunctions‚ temporary bypassing allows continued irrigation. Locate the sensor wires at the controller. Carefully disconnect both wires – typically labeled ‘Sensor’ or ‘SEN’. Use wire connectors to bridge the two disconnected terminals‚ effectively mimicking a dry sensor condition. This disables rain-sensing functionality‚ so monitor weather forecasts closely to avoid overwatering. Bypassing is a short-term solution; promptly replace the faulty sensor to restore automatic rain shutoff. Always power off the controller before working with wiring to prevent electrical shock.
Spray Head Maintenance and Repair
Regular spray head maintenance ensures efficient watering. Adjust spray patterns using the flow adjustment screw to prevent water waste on sidewalks or driveways. Inspect for clogs or mineral buildup; clean nozzles with a small wire or replace them if damaged. For damaged heads‚ carefully unscrew and remove the old head. Apply Teflon tape to the threads of the new spray head before screwing it firmly into place. Ensure proper alignment and test the spray pattern after installation. Consistent checks prevent uneven watering and maintain optimal landscape health.
Adjusting Spray Patterns
Fine-tuning spray patterns maximizes water efficiency. Locate the flow adjustment screw‚ typically on the top of the spray head. Turning it clockwise reduces the spray distance‚ while counterclockwise increases it. Observe the spray coverage and adjust until water reaches the intended areas without overspray onto hard surfaces. Consider wind conditions; reduce the radius on windy days. Regularly inspect and readjust patterns as needed due to settling or landscape changes. Proper adjustment conserves water and promotes healthy plant growth‚ ensuring a lush and vibrant landscape.
Replacing Damaged Spray Heads
Damaged spray heads hinder efficient watering. First‚ shut off the water supply to the zone. Unscrew the old head‚ noting its spray pattern (full‚ half‚ quarter circle). Wrap the threads of the new head with Teflon tape for a watertight seal. Carefully screw in the replacement‚ ensuring it’s aligned correctly. Match the nozzle type to the original for consistent coverage. Turn the water back on and check for leaks. Adjust the arc and distance as needed. Replacing damaged heads restores optimal performance‚ preventing water waste and maintaining a healthy landscape.
Winterizing Your Rain Bird System
Protecting your system from freezing temperatures is crucial. Begin by shutting off the water supply. Blowing out sprinkler lines with compressed air removes residual water‚ preventing pipe bursts. Disconnect the backflow preventer and drain it thoroughly. Insulate the controller‚ bringing it indoors if possible‚ to shield it from the cold. Protect exposed wiring. Remember to also address the rain sensor‚ disconnecting it or covering it appropriately. Proper winterization prevents costly spring repairs and ensures a quick start-up when warmer weather returns‚ safeguarding your investment.
Blowing Out Sprinkler Lines

Effectively removing water from lines prevents freezing damage. First‚ disconnect the backflow preventer. Attach an air compressor to the system’s main line‚ using a blowout adapter. Set the compressor to 50-60 PSI. Open each zone valve sequentially‚ allowing compressed air to force water out of the lines. Continue until all water is expelled from each zone. Cap the open ends of the lines‚ if applicable. This process ensures thorough drainage‚ safeguarding pipes and sprinkler heads from cracking due to ice expansion‚ preserving system integrity throughout the winter months.
Protecting the Controller from Freezing
Safeguarding the ESP-Me controller is crucial during winter. If located in an unheated garage or shed‚ consider bringing it indoors for the season. Alternatively‚ insulate the controller with a weatherproof cover or enclosure. Disconnect the power supply to minimize electrical risks. Ensure the controller remains dry‚ as moisture exacerbates freezing damage. Regularly check for any signs of condensation. Proper protection prevents component failure‚ extending the controller’s lifespan and ensuring reliable operation when spring arrives‚ avoiding costly replacements and downtime.
Advanced Features and Settings
Rain Bird ESP-Me controllers offer sophisticated options for experienced users. Pump start relay configuration allows integration with booster pumps‚ ensuring adequate water pressure across all zones. The ESP-LXD series utilizes two-wire decoder technology‚ simplifying wiring and expanding system capacity. These controllers support master valve control and flow sensing capabilities. Explore seasonal adjustment features to optimize water usage based on changing weather patterns. Utilize the cycle and soak function to improve water absorption and reduce runoff. Mastering these advanced settings maximizes efficiency and customization.
Pump Start Relay Configuration
A pump start relay activates an external pump when irrigation demands exceed available water pressure. Connect the relay to the controller’s designated terminals‚ typically labeled “P” or “Pump.” Configure the controller to energize the relay simultaneously with the first valve zone requiring boosted pressure. Ensure the relay’s voltage matches the pump’s requirements. Proper wiring and configuration prevent pump damage and ensure consistent water flow. Verify the pump’s electrical connections and safety features before activation. This setup is crucial for larger systems or those with low municipal water pressure.
Two-Wire Decoder Controller Operation (ESP-LXD Series)
The ESP-LXD series utilizes a two-wire path to communicate with decoder-equipped valves‚ simplifying wiring for large irrigation zones. Each valve possesses a unique address‚ allowing the controller to individually activate them. Programming involves assigning addresses to each valve during setup. This system reduces the need for individual valve wiring back to the controller. Troubleshooting often involves verifying decoder addresses and wire connections. Proper operation relies on a consistent two-wire signal and correctly programmed valve addresses‚ offering efficient control for expansive landscapes.
Finding Professional Help: Expert Irrigation Services
When DIY solutions prove insufficient‚ seeking expert irrigation services is crucial. Licensed and insured contractors specialize in Rain Bird system repairs‚ maintenance‚ and complex troubleshooting. These professionals possess the knowledge to diagnose intricate valve issues‚ optimize spray patterns‚ and efficiently winterize your system. They can also assist with advanced configurations like pump start relays and decoder controllers. Expert Irrigation‚ for example‚ offers comprehensive services‚ ensuring your landscape receives optimal water distribution. Don’t hesitate to consult a pro for lasting solutions and peace of mind.